Sunday 8 July 2018

My new favourite colour

Hello! Thank you for stopping by.

I'm still relatively new to Stampin' Up!, so the returning colours (apart from Flirty Flamingo) are all brand new to me.  I've completely fallen in love with Blackberry Bliss!  This is going to be the first full card I order (I've ordered all the colours in each of the families, the ones where you get the Subtles, and you get two of each colour).  I'm going to need way more than 2 sheets of Blackberry Bliss though!

This card is a mix of many cards I've seen all over the place, so I can't give credit to any one person.  


I find it quite difficult to photograph the Tufted Embossing Folder, however you can see it in the background here.

You may remember I said in a blog a while ago that I really needed this Painted Glass stamp set for the lovely sentiments, and these butterflies.  So I bought it, along with the Stained Glass framelits.

I coloured the Graceful Glass velum with my Blends pens - Old Olive and Rich Razzleberry.  I then sponged tombow glue onto Whisper White cardstock, and adhered the Velum to it.

After colouring the butterflies I adhered them to the card with dimensionals, and placed two clear rhinestones on the body.

I stamped the sentiment in Memento Black, and coloured the 'B' in just because I could!  The sentiment was cut out with the Banner Triple Punch, and also adhered to the card with dimensionals.

Put it all together, and that's what you've got!

If you live in New Zealand and would like to purchase any of the products I've used to make this card, please click on the pictures below, and you'll go straight to my online store.

It's Sunday evening at the moment here in New Zealand, so I hope your week starts well!

Take care,
Andrea

Product List
SHARE:

Monday 2 July 2018

Natures Poem on a Pyramid Card

I'm not terribly confident with fancy fold cards, but my very talented friend Lyn showed me this one and I thought even I could do it!  Of course, I did some learning along the way, which I will share with you.  The original pattern is from Splitcoaststampers.


The next picture will show you what it looks like open, and you can write on the white pieces.  The rest of the card is covered in Natures Poem Designer Series Paper (DSP)


So to start, you need three squares of cardstock, measuring 3.5" x 3.5".  I used Tranquil Tide, as it goes really nicely with the Natures Poem DSP


Each piece is scored down the diagonal.

Next you take one of the pieces of card, and apply adhesive to it as shown here (I used Liquid Multipurpose Glue).  You only want the adhesive going this far down the diagonal.


Next you adhere the other two pieces of card to this one - watch the direction of the scoring (ask me how I know this!)


Once you've done this, fold each of the left and right pieces in towards the bottom cards' diagonal


I decided to use some magnets to keep the card nicely closed when it is standing up.  I've never worked with magnets before.  There are some tricks for young players!  One is - when you've adhered them with glue, don't expect the magnet to stay in place as you try to check placement - it will immediately stick to it's mate.  The next trick is watch your polarity - I kept accidently sticking down the opposite sides, so they repelled each other rather than closing the card.  And finally - if you put them more in the centre of the closing flap you only need two magnets.  If you put them on the left and right of the flap, you'll need four magnets!  Anyway, I finally had a closure that would work.

I then carefully cut the Nature's Poem paper and adhered it to each part of the card that wasn't where you would write your handwritten note to the recipient of the card.

This is the back side of the card:


Here's the inside of the card.  It's a little hard to see, but the white paper in the middle is where you would write your note.


This next photo is to show you that this card with the 3.5" squares will fit in a standard Stampin' Up! envelope.  I used a Very Vanilla envelope for the picture so it showed against my white background - you have to really look to see it though.


Back to the final outcome:


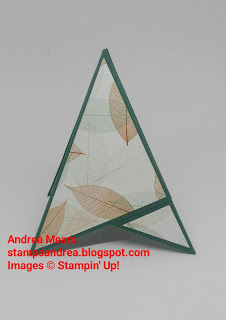
There you have it - a Pyramid Card, covered with the beautiful Nature's Poem DSP.

If you would like to purchase any of the products I've used to make this card, please click on the pictures below - you'll go to my online store, where you can shop at a time that suits you.

Thank you for stopping by!
Take care,
Andrea

Product List
SHARE:
MINIMAL BLOGGER TEMPLATES BY pipdig